Usage
All functions from the library is starting with a_, this way you can still easily use pyautogui inside your code if you want to.
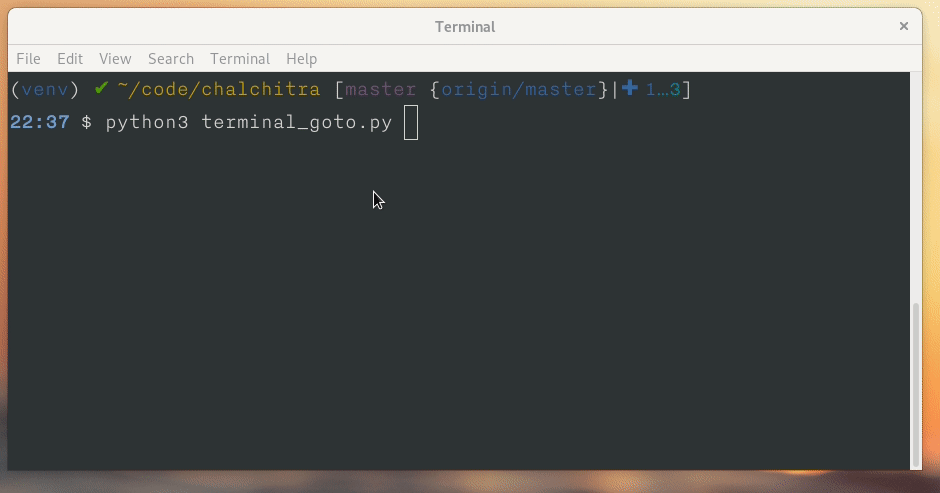
Example to open a new tab in the terminal
In the following example, we open a new tab in the Gnome terminal, and then go to the /tmp directory. As we are not using any screenshot here, we skip the a_setup call.
import time
from chalchitra import *


def goto_path(path=""):
    a_hotkey(["ctrl", "shift", "t"])
    time.sleep(0.5)
    a_typetext("cd {}".format(path))
    a_keypress("enter")


if __name__ == "__main__":
    goto_path("/tmp")
In the goto_path function, first we are pressing a hotkey combination, the keys are passed into the a_hotkey function as a list. Then we wait for 0.5 seconds for the terminal tab to open, and then type the command using a_typetext function call. Finally using the a_keypress function we press the enter key in the keyboard.
If you want to see all the keys you can use in a_keypress or a_hotkey, below is the list (stored in the KEYS variable).
['\t', '\n', '\r', ' ', '!', '"', '#', '$', '%', '&', "'", '(', ')', '*',
'+', ',', '-', '.', '/', '0', '1', '2', '3', '4', '5', '6', '7', '8', '9',
':', ';', '<', '=', '>', '?', '@', '[', '\\', ']', '^', '_', '`', 'a', 'b',
'c', 'd', 'e', 'f', 'g', 'h', 'i', 'j', 'k', 'l', 'm', 'n', 'o', 'p', 'q',
'r', 's', 't', 'u', 'v', 'w', 'x', 'y', 'z', '{', '|', '}', '~', 'accept',
'add', 'alt', 'altleft', 'altright', 'apps', 'backspace', 'browserback',
'browserfavorites', 'browserforward', 'browserhome', 'browserrefresh',
'browsersearch', 'browserstop', 'capslock', 'clear', 'convert', 'ctrl',
'ctrlleft', 'ctrlright', 'decimal', 'del', 'delete', 'divide', 'down', 'end',
'enter', 'esc', 'escape', 'execute', 'f1', 'f10', 'f11', 'f12', 'f13', 'f14',
'f15', 'f16', 'f17', 'f18', 'f19', 'f2', 'f20', 'f21', 'f22', 'f23', 'f24', 'f3',
'f4', 'f5', 'f6', 'f7', 'f8', 'f9', 'final', 'fn', 'hanguel', 'hangul', 'hanja',
'help', 'home', 'insert', 'junja', 'kana', 'kanji', 'launchapp1', 'launchapp2',
'launchmail', 'launchmediaselect', 'left', 'modechange', 'multiply', 'nexttrack',
'nonconvert', 'num0', 'num1', 'num2', 'num3', 'num4', 'num5', 'num6', 'num7', 'num8',
'num9', 'numlock', 'pagedown', 'pageup', 'pause', 'pgdn', 'pgup', 'playpause', 'prevtrack',
'print', 'printscreen', 'prntscrn', 'prtsc', 'prtscr', 'return', 'right', 'scrolllock',
'select', 'separator', 'shift', 'shiftleft', 'shiftright', 'sleep', 'space', 'stop',
'subtract', 'tab', 'up', 'volumedown', 'volumemute', 'volumeup', 'win', 'winleft',
'winright', 'yen', 'command', 'option', 'optionleft', 'optionright']
Screenshot matching and using mouse
The following functions and examples take help of matching screenshots and using the mouse to click on the different elements on the screen.
Call a_setup first
In every code base, remember to call a_setup (if you are using screenshots) to verify or do mouse clicks on the items on the screen. The function takes one argument, the directory path where we store the screenshots for the project.
a_setup("images")
Right now there are two different mouse click functions available. a_click and a_doubleclick. Both the functions take an image name (screenshot) as the first argument, if it can find the image on the screen, then it clicks on the center (of the image). If the image was found and then clicked, then the function returns True or else False.
After every mouse click, we should wait for some time so that screen redraws itself (think when you are saving a file, and the filename showsup somewhere in the screen). We can use time.sleep calls for the same.
Similarly one can call a_verify function to verify if an image (screenshot) can be found on the screen. This way we can verify the state of the application we are testing.
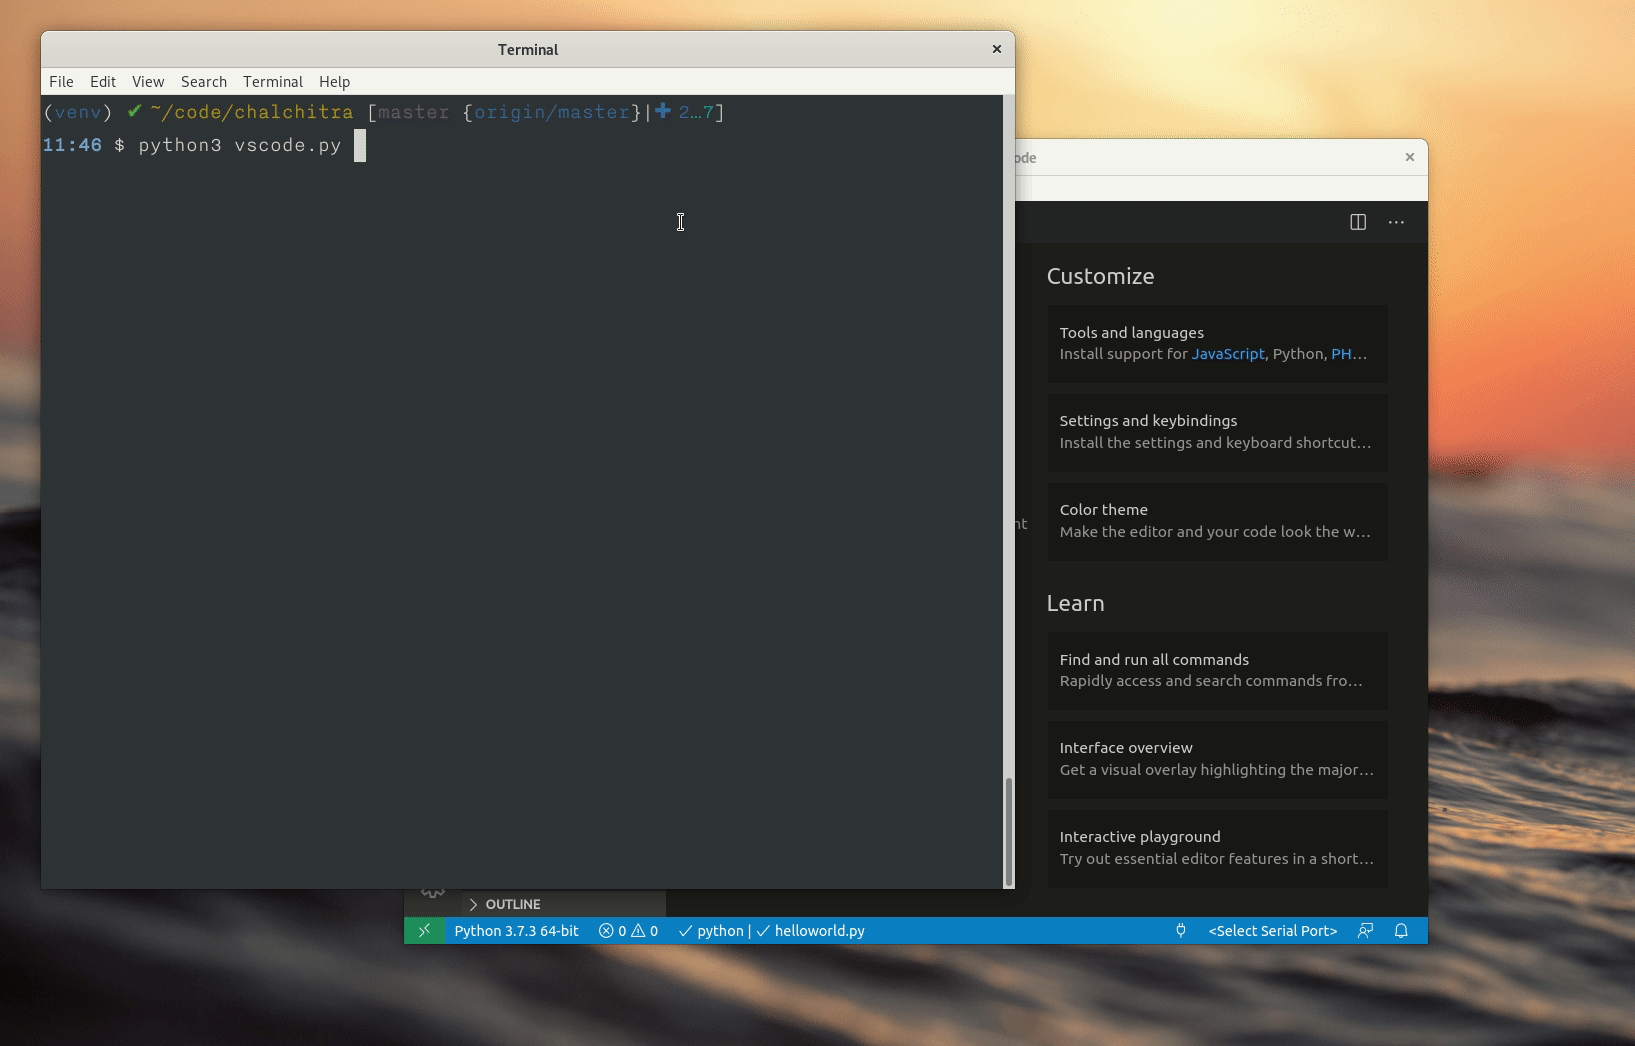
VS Code and Python code execution example
In the following example, the code presses Alt+Tab to go the VS Code window, then creates a new file, then types in the Python source code. Then it saves the file with the name helloworld.py, then presses Ctrl+F5 to execute the file. Because the developer’s setup of the VS Code, it also has to select which Python environment to use.
import time
from chalchitra import *
def main():
a_setup("parts/vscodepy")
# Click on the new file
assert a_click("newfile")
time.sleep(0.5)
# Type our code
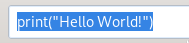
a_typetext('print("Hello World!")')
# Save the file
a_hotkey(["ctrl", "s"])
time.sleep(0.5)
# type the filename
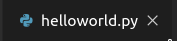
a_typetext("helloworld.py")
# Press Enter
a_keypress("enter")
time.sleep(1)
# Now verify that the file saved with the correct filename
assert a_verify("correct_filename")
# Execute the code
a_hotkey(["ctrl", "f5"])
time.sleep(0.5)
# Because I have two different environment in my VS Code setup, I will
# have to select Python
assert a_click("python_env")
time.sleep(0.5)
# verify that the correct output is the screen
# reduced the confidence to make sure if finds properly.
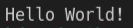
assert a_verify("output", confidence=0.7)
if __name__ == "__main__":
# sleep for 1 second for the screencast recording
time.sleep(1)
# Move to the VS Code window
a_hotkey(["alt", "tab"])
time.sleep(0.5)
main()
You will notice that in the final a_verify call we are also passing the confidence value.
Below are the example screenshots used in the above code to match:


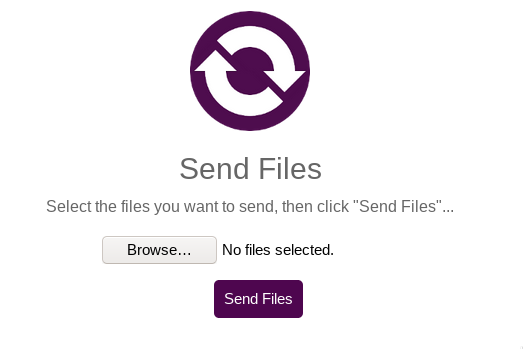
Receive file via OnionShare
In this example, we wil use the OnionShare tool to receive a file, we will use Tor Browser to do the actual upload.

The code is given below
import time
from chalchitra import *
def main():
a_setup("parts/onionshare")
# Click on the new file
assert a_click("receive_files")
time.sleep(0.5)
# Start receiving
assert a_click("start_receiving")
# wait for 10 seconds
time.sleep(10)
# copy the address
assert a_click("copy_address")
# Next 4 lines are to move to Tor Browser
a_keydown("alt")
a_keypress("tab")
a_keypress("tab")
a_keyup("alt")
# Sleep for the screencast
time.sleep(0.5)
assert a_click("tor_browser_urlbox", confidence=0.8)
a_hotkey(["ctrl", "v"])
time.sleep(1)
a_keypress("enter")
# Now we have to wait as it will go over Tor
time.sleep(10)
assert a_verify("youarelogin")
# Login to the site
assert a_click("okbutton")
# Wait again to load the page
time.sleep(10)
assert a_verify("looks_good_page")
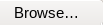
# Click on the Browse button to select
assert a_click("browse_button")
time.sleep(1)
a_keypress("enter")
time.sleep(1)
assert a_click("send_files")
# Now can you add code to verify if the upload is successful via file browser?
if __name__ == "__main__":
# sleep for 1 second for the screencast recording
time.sleep(1)
# Move to the OnionShare window
a_hotkey(["alt", "tab"])
time.sleep(1)
main()
The screenshots are below: